1. First off, if we have an Excel file then we need to save it as a Comma Separated Value (.csv) format file.
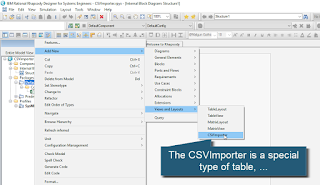
2. The CSVImporter is a special type of table layout in Rhapsody.

3. The Criteria tab of the Features dialog is used to select which type of element to import the CSV contents into.
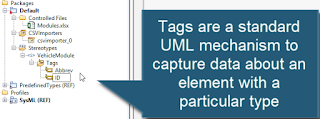
4. Stereotypes with tags are a common way to capture new types and the meta-data associated with them.

5. Do forget that if your element has spaces in it, and the meta-class you've chosen to import into does not allow them, then you need to first set-up Rhapsody to allow spaces.
6. You can relax this rule by setting a more relaxed regular expression in the General::Model::NamesRegEx property.
7. In the CSV Import Settings (launched from the right-click menu) we can specify which file to import and where to import into. We can also tick a box to ignore the heading row, if there is one.
8. The Features > Columns tab is used to specify where to import the Columns in the CSV into, e.g., you can specify to put the cell value in a tag owned by a stereotype.
9. You can perform the import by right-clicking the CSVImporter table layout.
10. Each CSV row has been imported as an element in the model, together with the tag values and the Description field.
11. We can change the display options on the diagram to see the imported values.
12. A property called General::Model::CSVImportPolicy controls whether the file or the model is favored if the import is carried out again.
13. That's not all. There are another couple of cool features. Right-click the CSVImporter and you can easily create a table view of the data that was imported.
14. There's also the ability to export a table view as a CSV file.


No comments:
Post a Comment
Note: only a member of this blog may post a comment.